
In part 3 of the series I’ll talk about everyone’s favourite subject: cloud! That word alone should surely boost the SEO for this blog…
Jokes aside, this part is about the capabilities of easily extending your on-prem network to the cloud, using SteelConnect.
Disclaimer: I work for Riverbed, all views and expressions on this blog are entirely my own and don’t necessarily reflect the views of my employer.
In part 2 of the series we connected a few sites using physical appliances, connected to an MPLS WAN and internet uplinks. These sites then built overlay VPN tunnels between themselves automatically. With a SteelHead-SD we could even automatically optimise those workloads.
That’s a great start, however nowadays many customers have workloads in either Azure or AWS, what if those need to be accessed as well? Well, look no further: with a few clicks a virtual SteelConnect gateway can be spun up in either AWS or Azure, once operational they are managed the same way as physical SteelConnect gateways. These cloud gateways automatically build VPN tunnels to all or selected sites and advertise the routes to all SteelConnect gateways, so a user in a physical site can access the applications in Azure or AWS within minutes, no matter what region or VPC they’re in, it’s even possible between both cloud computing providers. You can also add a virtual cloud SteelHead with one-click, to optimise applications that are running in either cloud to further enhance the user experience and application performance.
With the cloud SteelConnect gateway there is no requirement for an AWS-managed virtual private gateway (VPG), everything is managed through SteelConnect Manager.
There are two ways to deploy an AWS or Azure SteelConnect GW:
- Use SteelConnect Manager, recommended if you already have SteelConnect devices in your network.
- Deploy the SteelConnect Gateway from the AWS or Azure Marketplace.
This blog will focus on the first option, which is the most common deployment. Just for the fun of it we’ll add a virtual SteelHead as well to optimise cloud workloads.
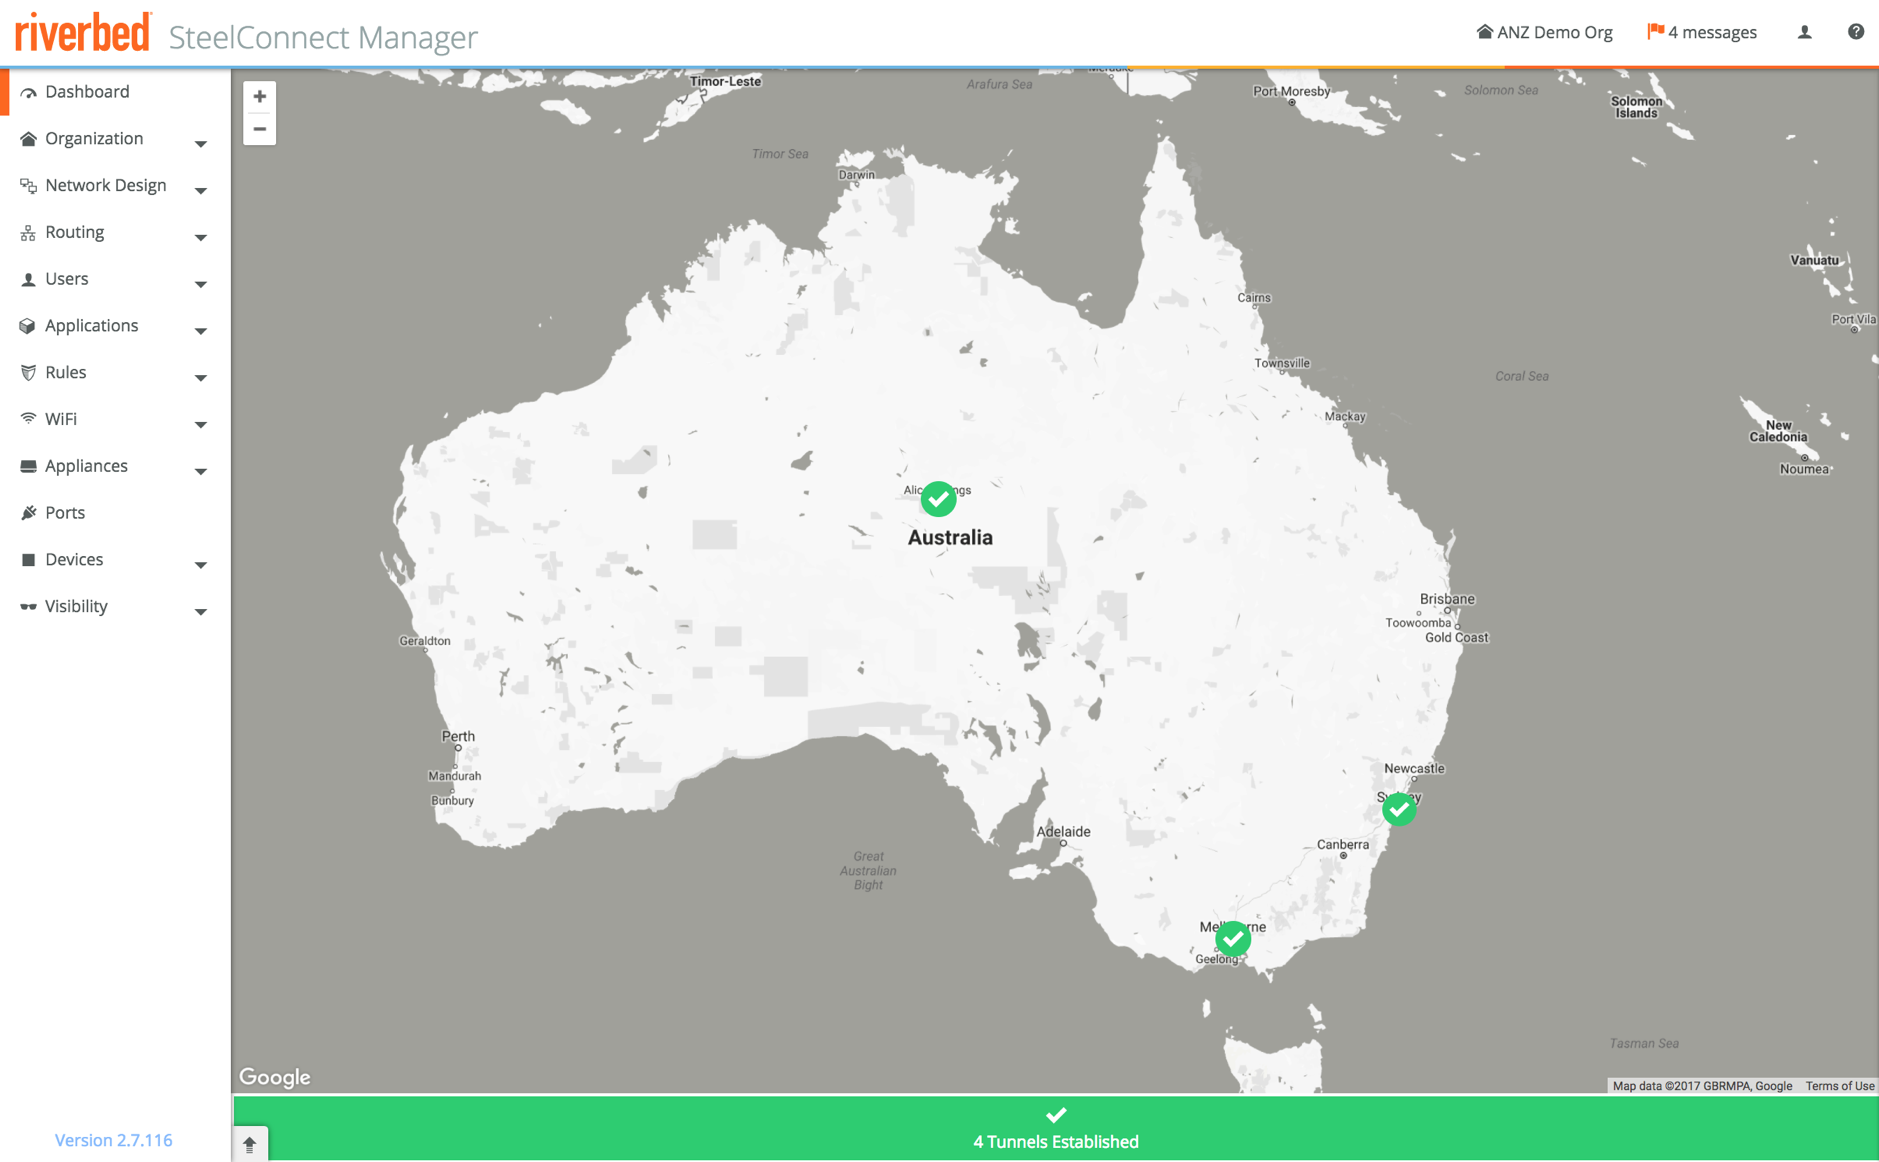
This was the 3-site setup from the last blog post, every site using hardware SteelConnect appliances:
To deploy things in AWS or Azure, we need to interact with their respective APIs with the right roles and permissions. To set that up you can follow the prompts in SCM for AWS, if you use Azure there are a few more steps required.
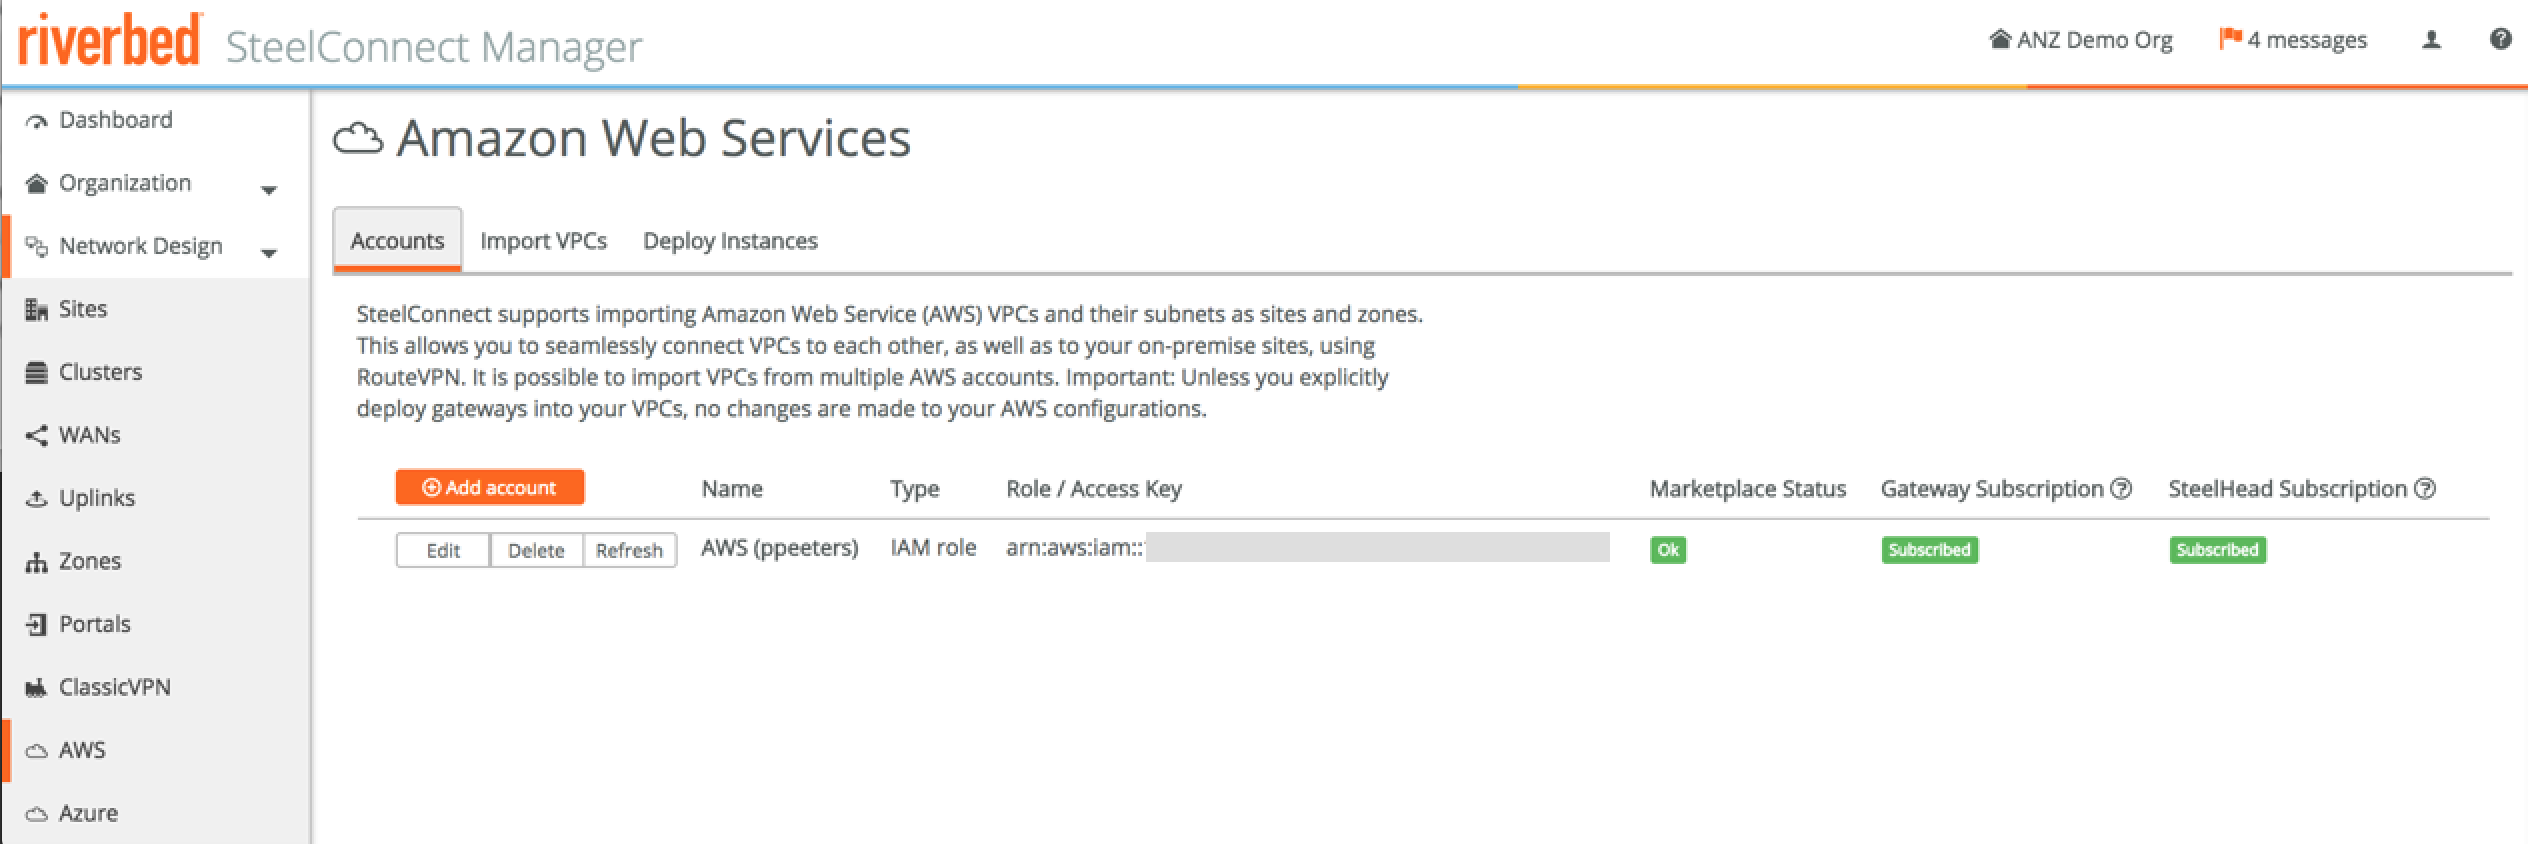
All the cloud settings are handled in **Network Design **-> AWS and **Network Design **-> Azure for the respective cloud computing providers. Other than the initial API connectivity setup the other steps are almost identical, so for simplicity reasons I’ll mostly use AWS in the screenshots below.
After the account has been setup with the right credentials, you’ll see something like this. Unless you want to change your credentials, you don’t have to revisit this tab.
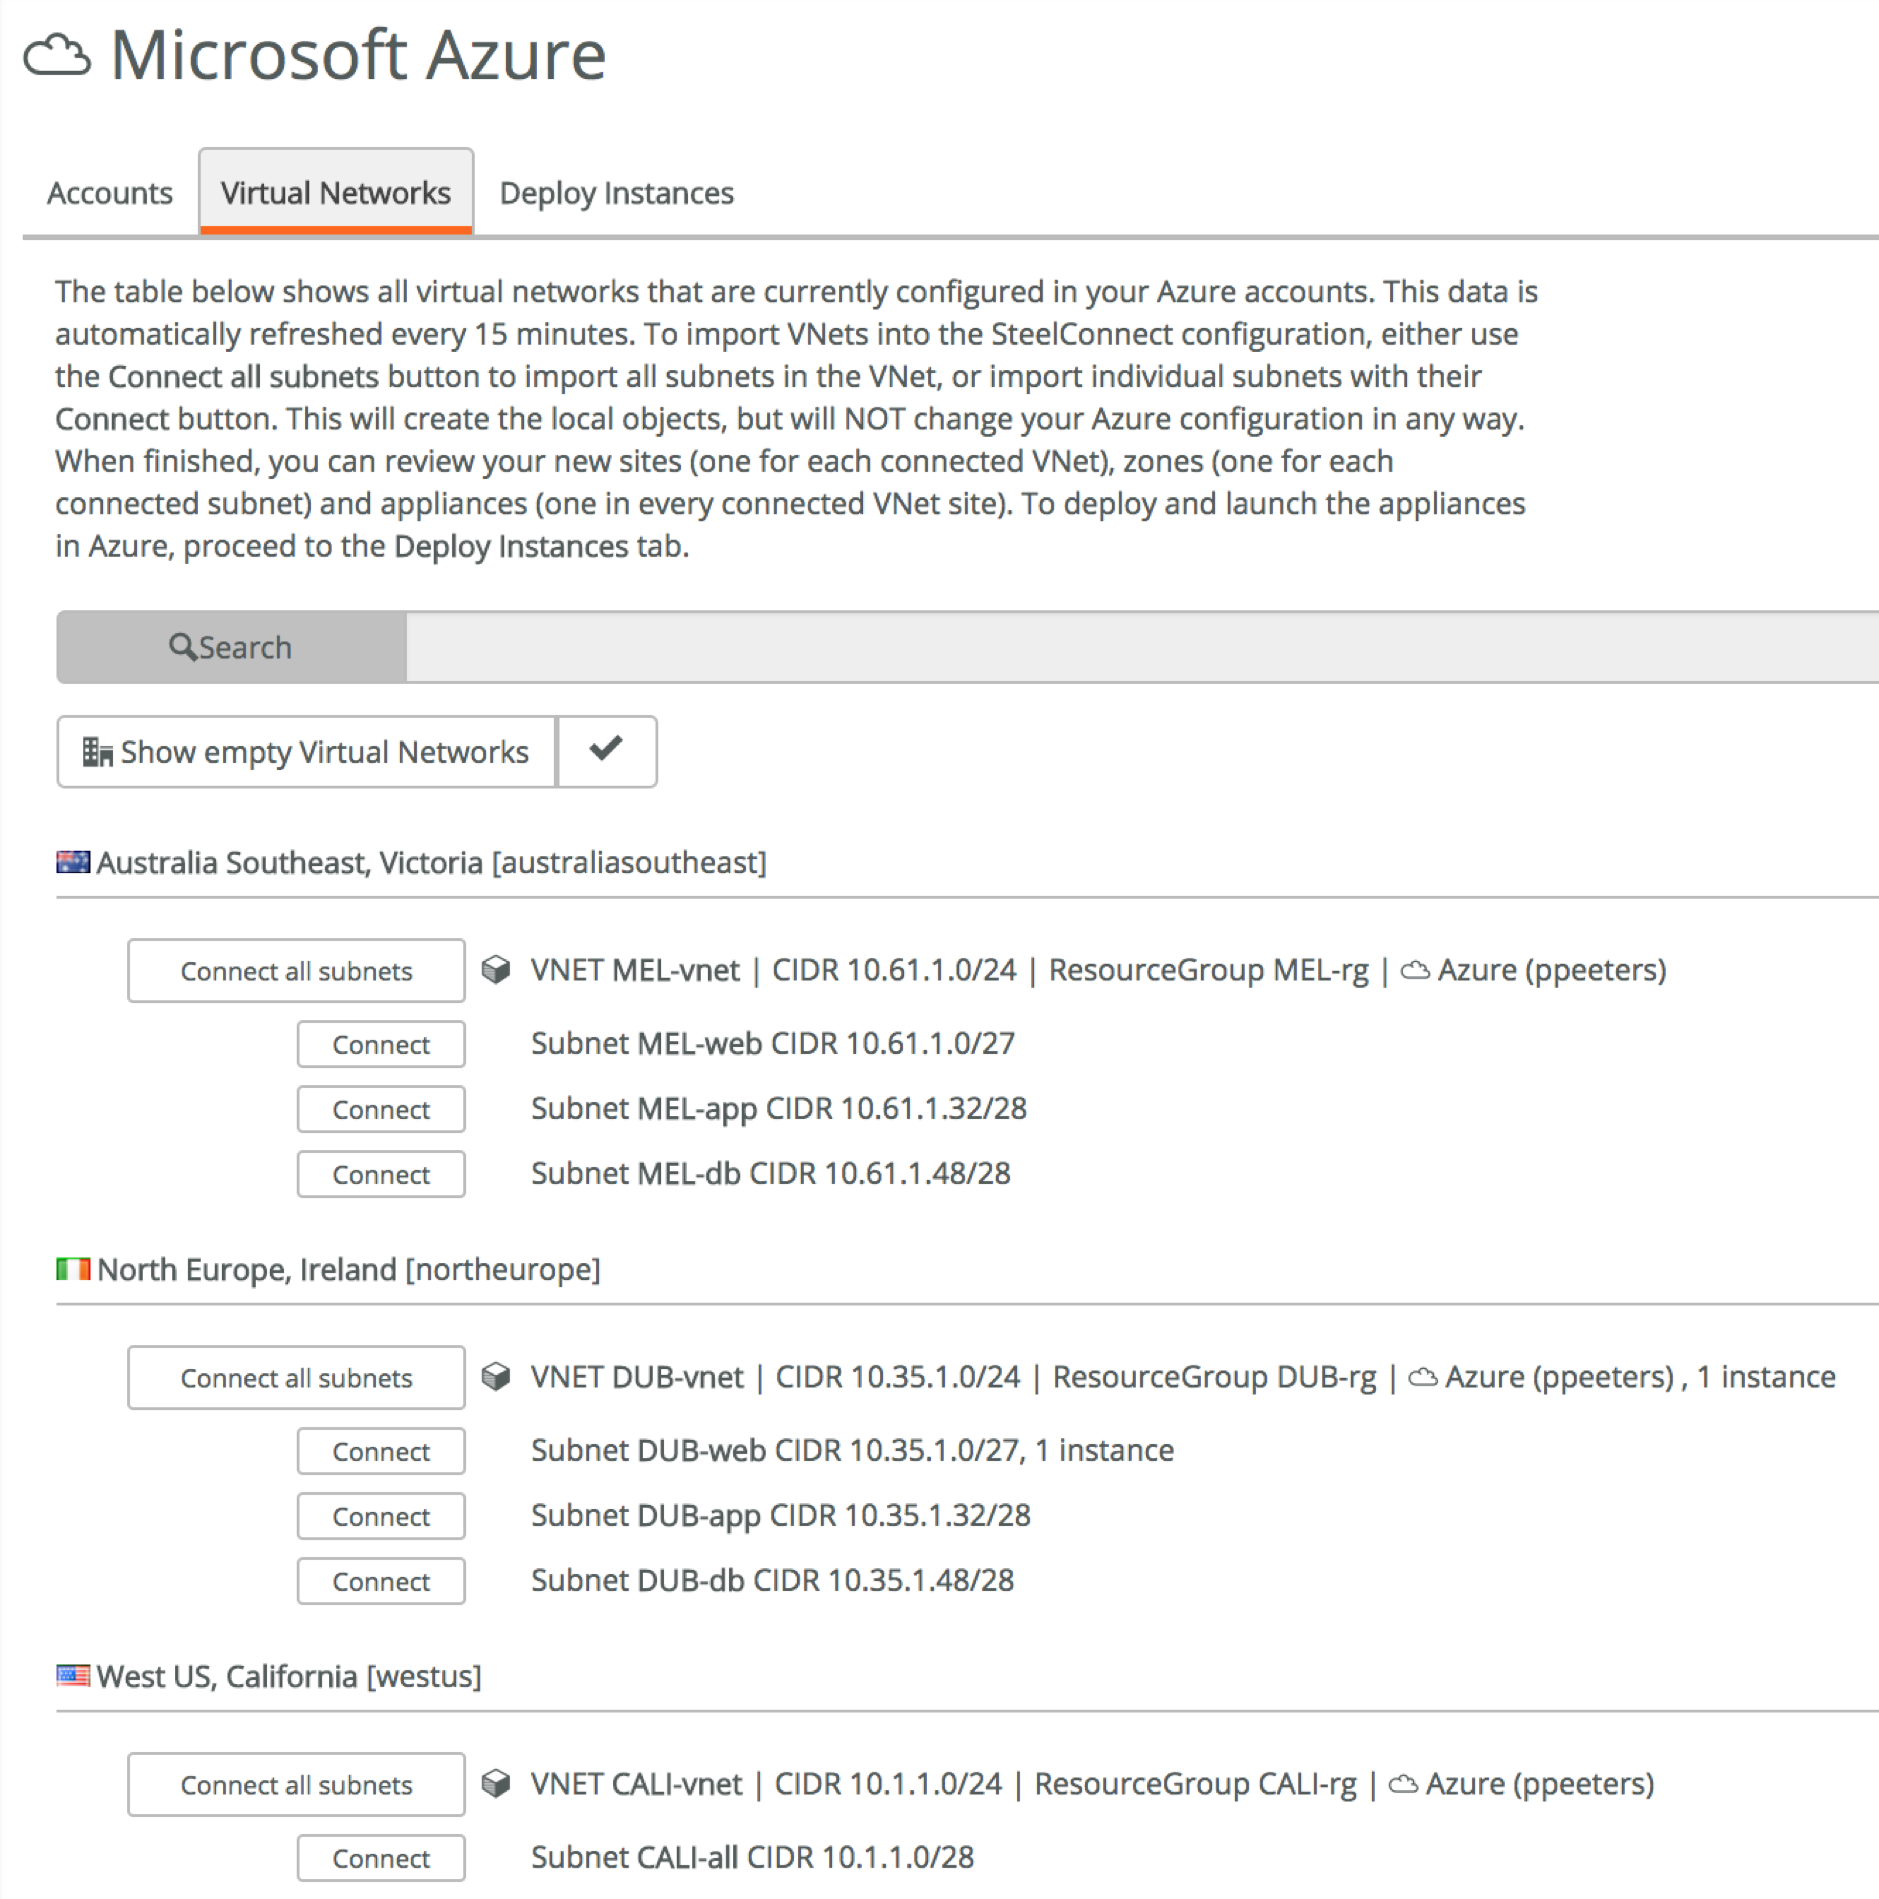
Next step is to import the VPCs or VNETs that you want to connect to, using the Import VPC (AWS) or **Virtual Networks **(Azure) tab. The available networks are fetched using the API credentials provided in the previous step, in my case I’m running a Turnkey File Server instance in North Virginia and a webserver in Frankfurt (AWS), and a Windows Server 2016 instance in Dublin (Azure).
Let’s say we want to access just those instances, all we have to do is to connect the VPC/network they are attached to. If you’re running instances everywhere, you can just connect all subnets making it easier for yourself. This by itself does nothing yet, other than creating the sites on the dashboard map and preparing us for the final step. It also means that at this stage, nothing is being spun up in AWS or Azure and you’re not being billed.

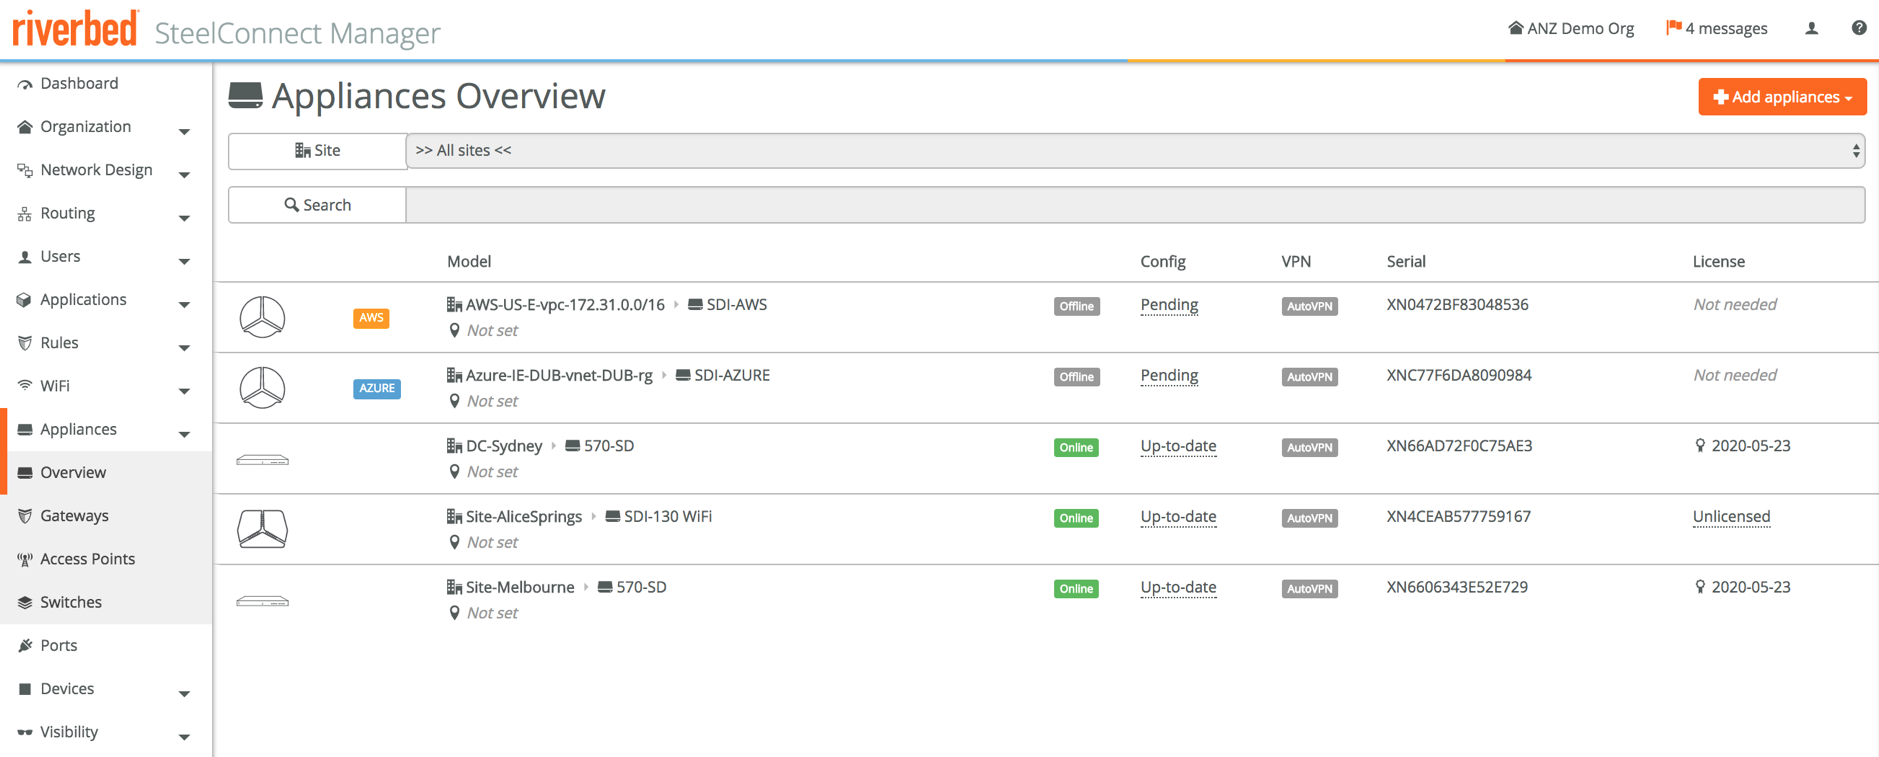
This is what the SCM dashboard looks like after importing the networks but before deploying the actual gateways, with the sites present but still being offline as they haven’t been deployed yet.

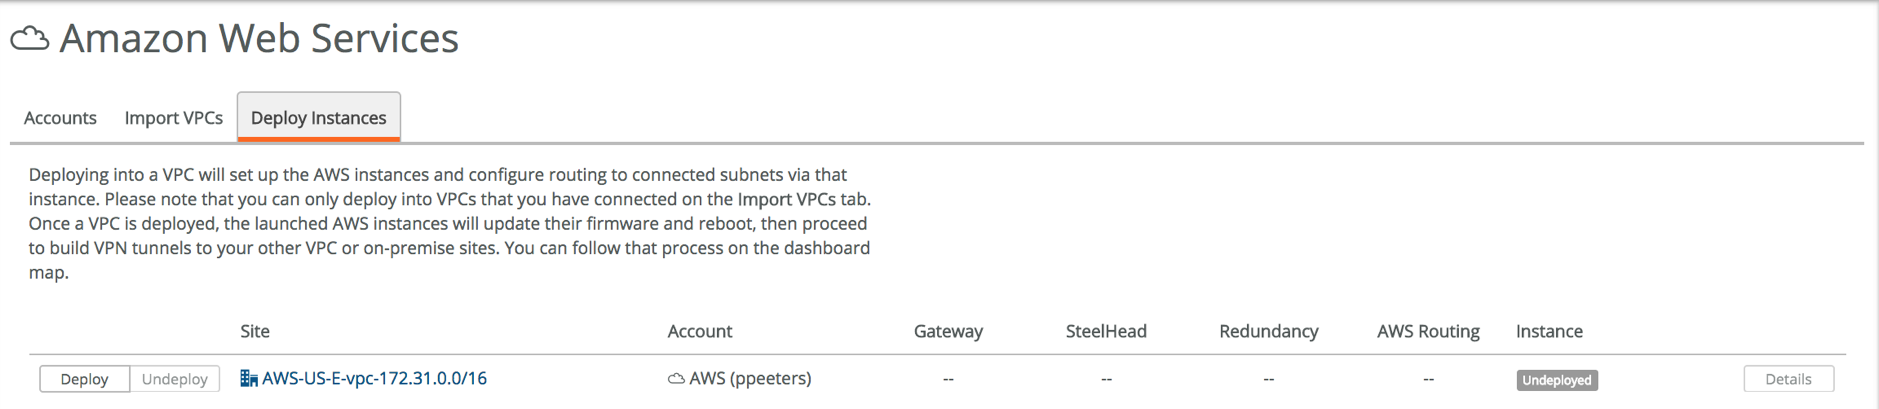
The final step is to deploy the gateways and (optionally) SteelHeads, so we can access the instances from our own premises, with automatically setup tunnels and routing.
Go to Deploy Instances and click on Deploy. Choose the options that are right for your business and click Submit.

This will kick-off a process in the background to create the instances in AWS/Azure, and automatically configure the networking so that the cloud networks are advertised to the on-prem SteelConnect gateways and ultimately to provide your users access to the applications running in the cloud. This is also the part where Amazon or Microsoft will start charging you for the resource usage.
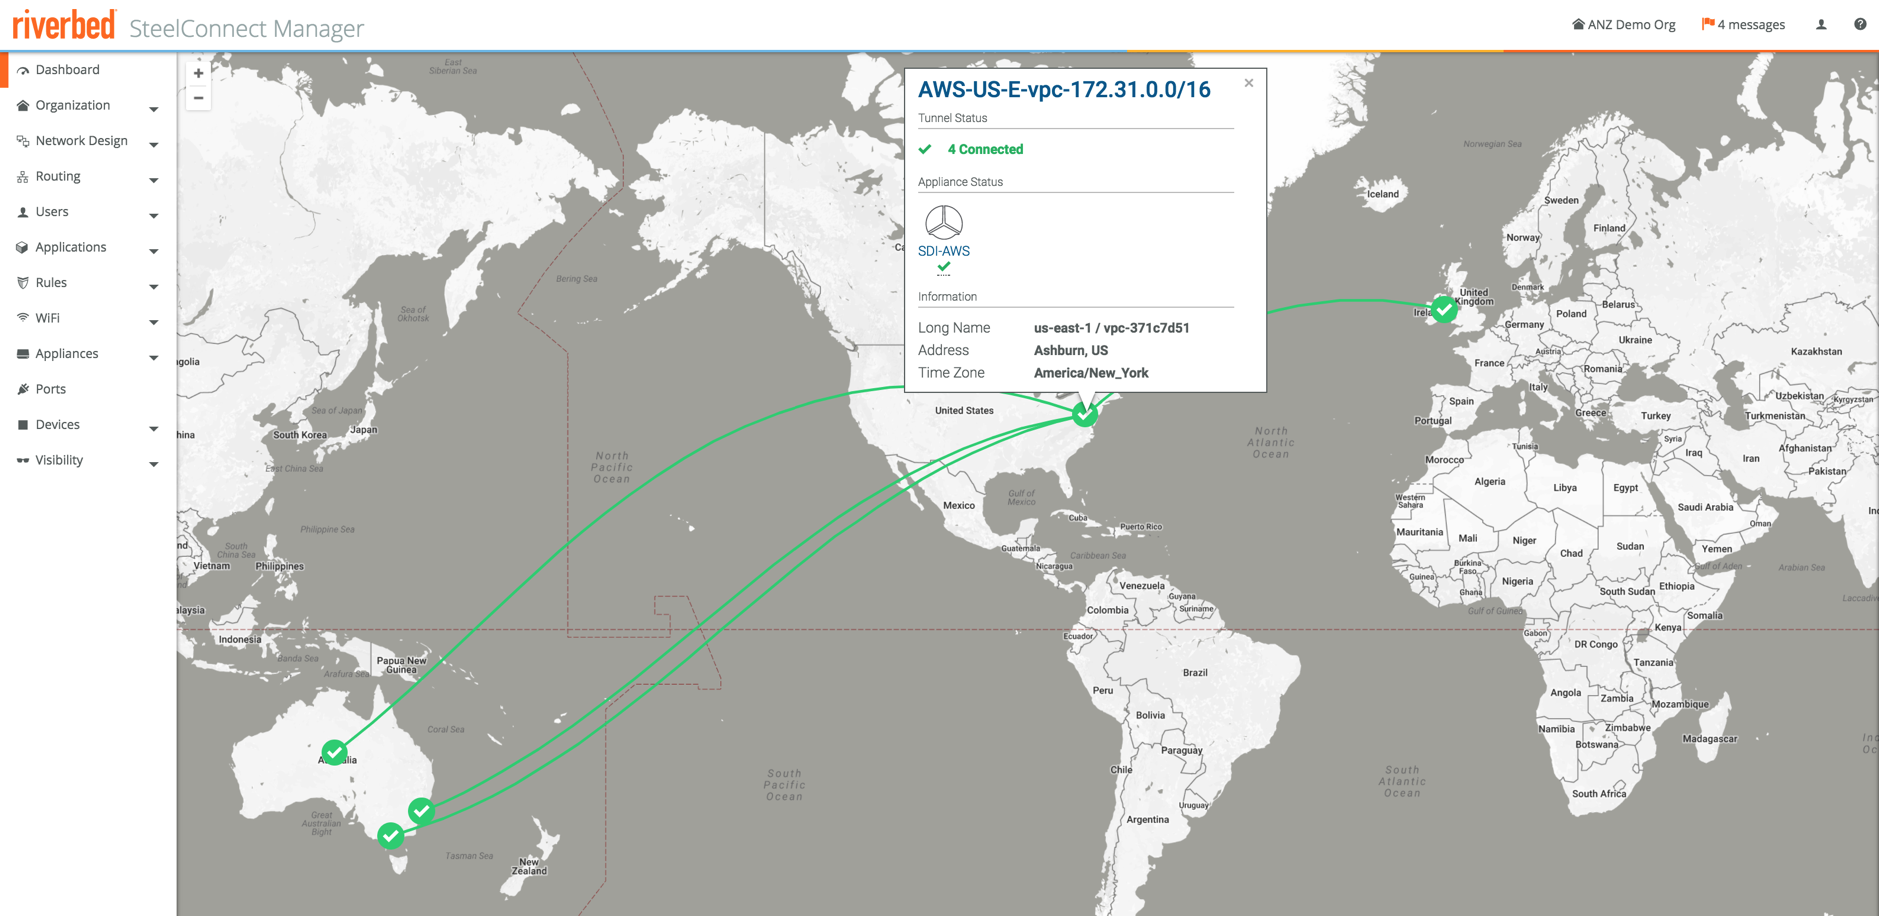
You’ll see a lot of messages in the Event Log, in my case you can see it took less than 7 minutes from deployment to having the automatic overlay tunnels connected, meaning users could access the applications running in AWS/Azure.


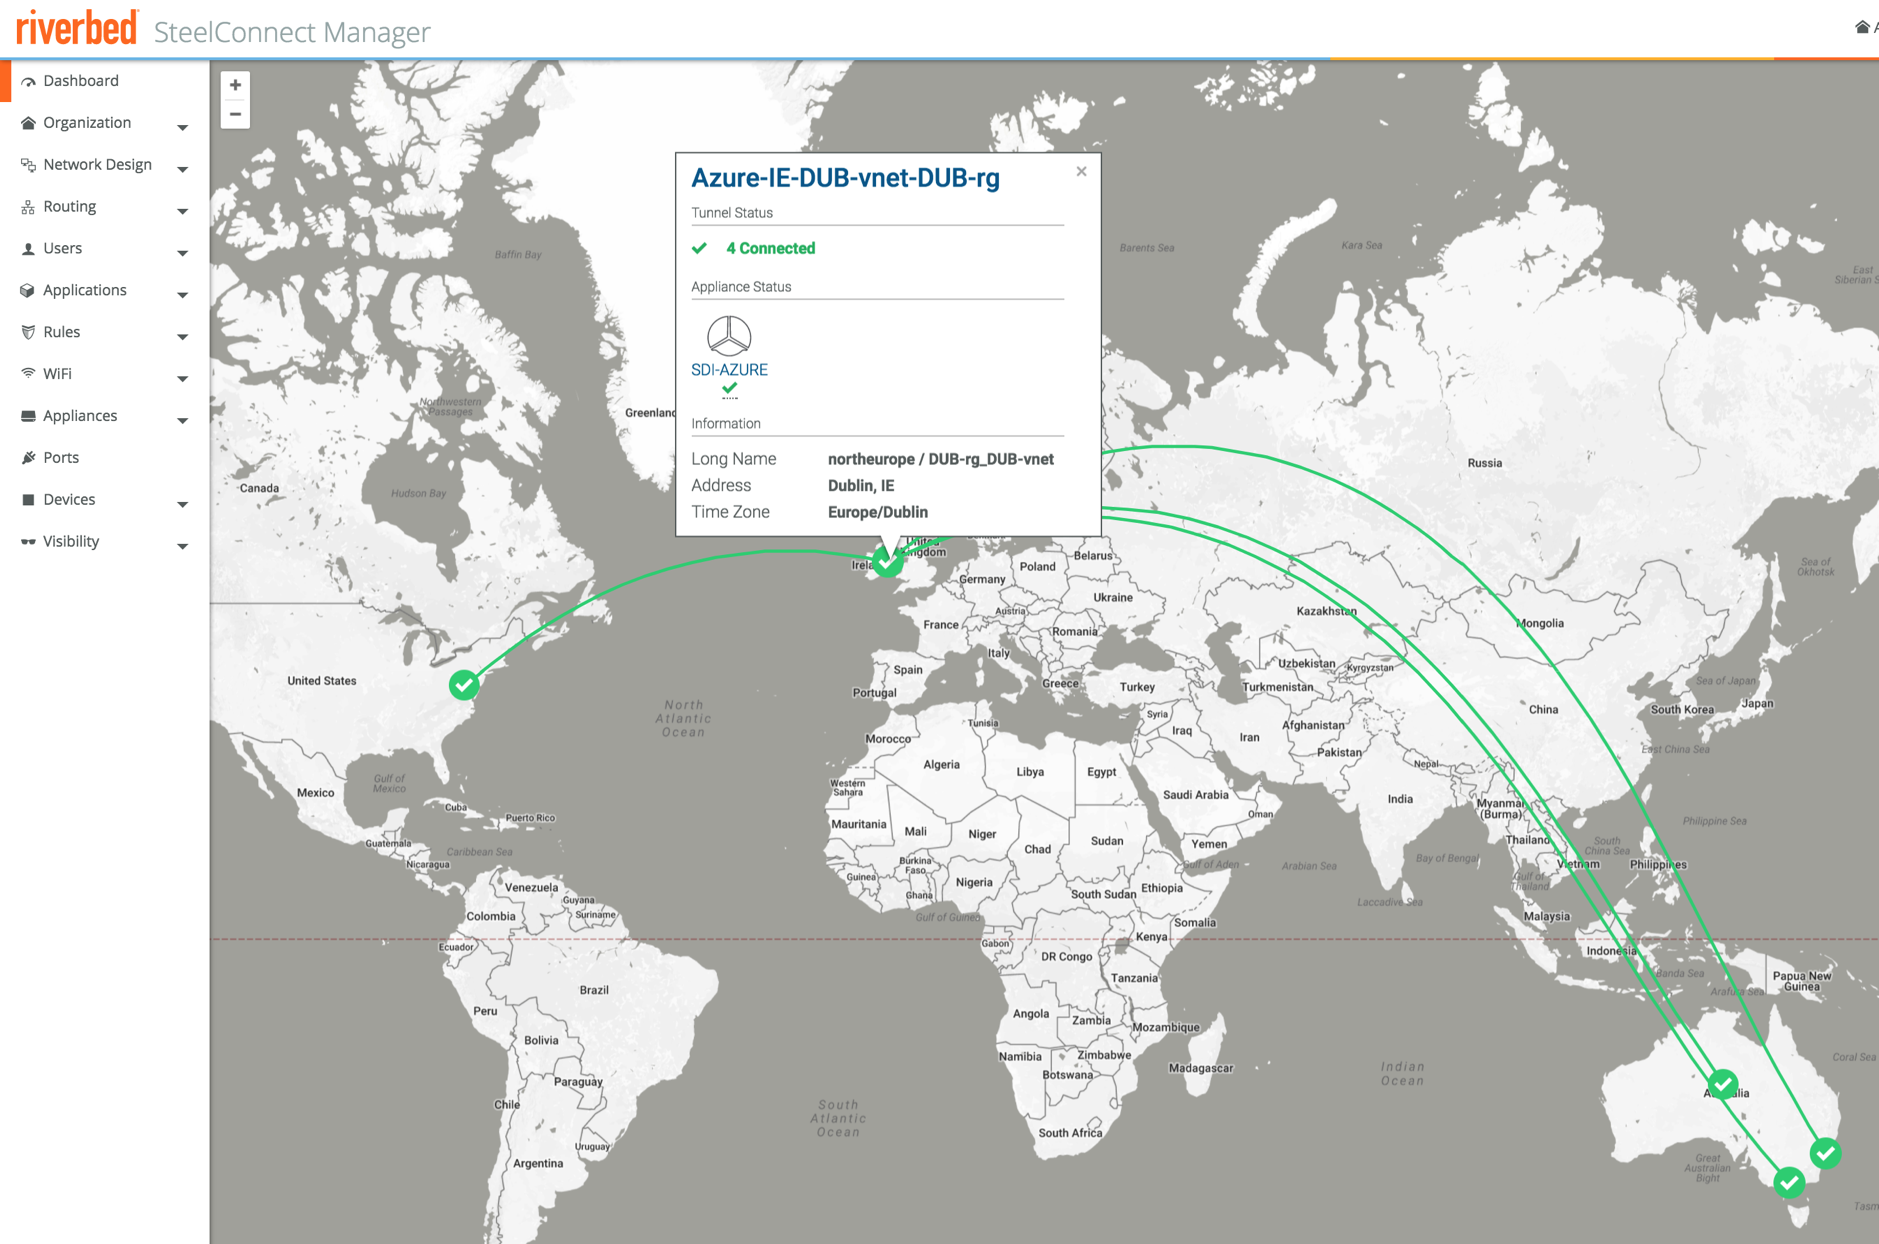
Looking at the map again all devices are now green, with full mesh tunnels built between all sites, those in the cloud as well as the physical appliances.
That’s all there is to it really, the deployment really only takes minutes and a few clicks. Writing this blog post took many times longer than actually performing the steps, including setting up the VPCs and networks in AWS or Azure.
One last thing I wanted to show is how simple it is to also optimise WAN traffic with SD-WAN. As Scott Gibson said in this blog post on ciodive.com: “Successful organizations will leverage the power of 1 + 1 = 3, where the usage of both technologies combined will be far greater than the performance benefits each could achieve individually.”
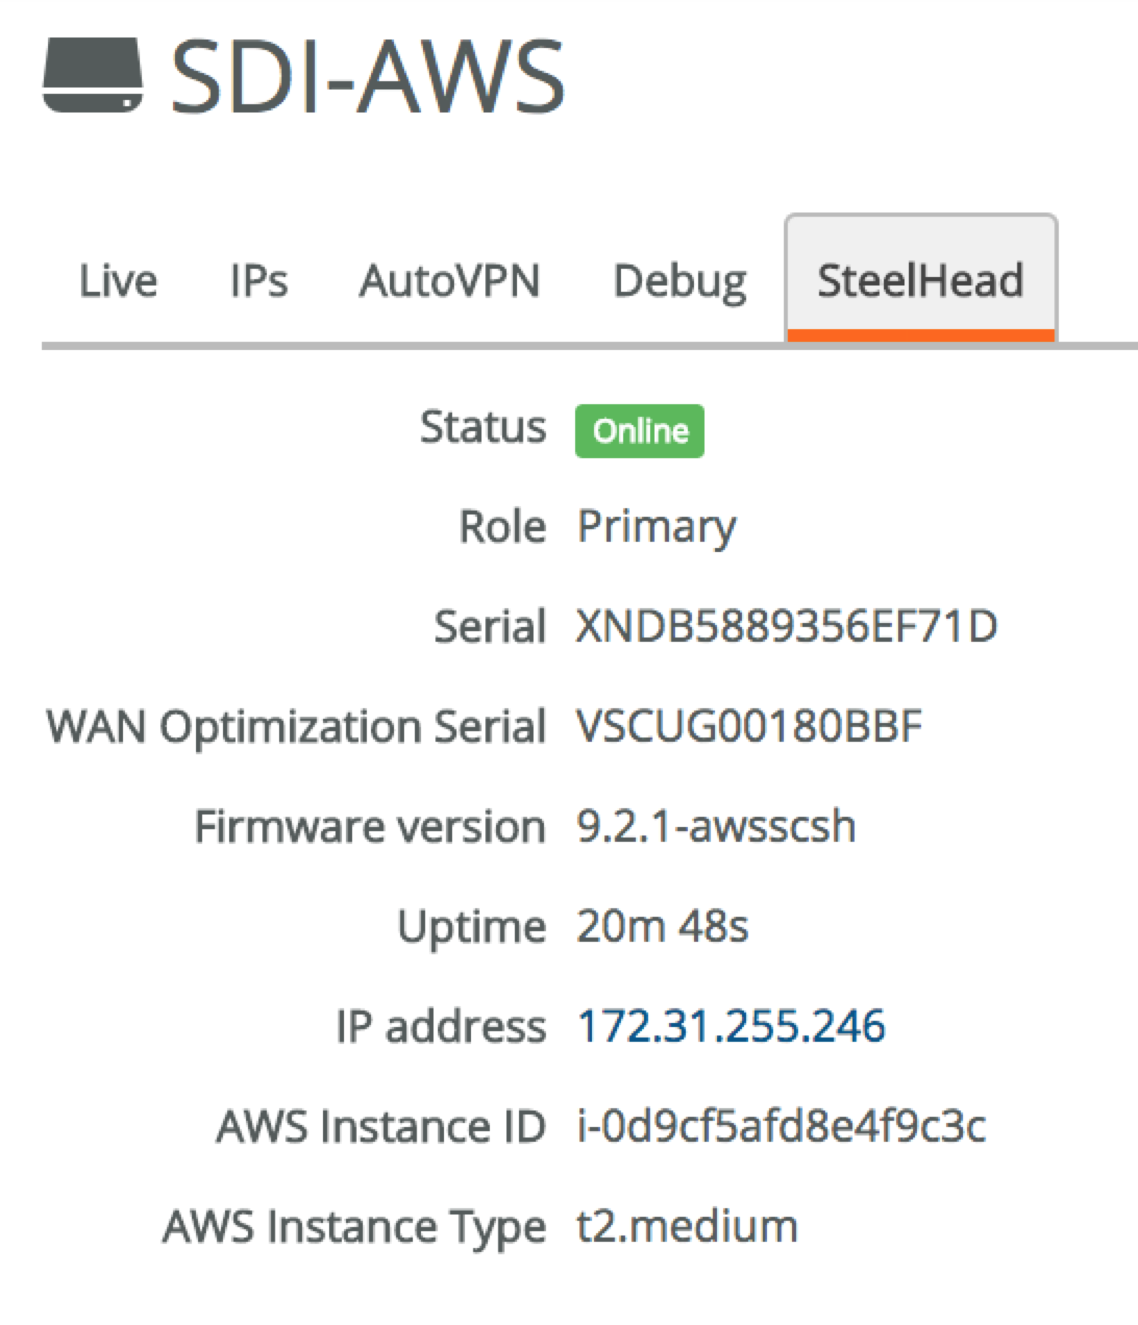
In the previous steps we didn’t just deploy a SteelConnect gateway, we also deployed a virtual SteelHead. The networking is automatically configured in a way that all traffic in and out of the cloud network is going through the virtual SteelHead (and obviously the virtual gateway), and they’re neatly integrated.
For example, the IP address of the virtual SteelHead can be found in the AWS appliance overview. I’m connected via the SDI-130W to the network, so can access it directly from my laptop.
The SDI-130W that I’m connected to doesn’t have support for WAN optimisation, so for this last part I’ll do a file transfer between the Windows Server 2016 VM in Dublin/Azure (10.35.1.4) and the file server in North Virginia/AWS (172.31.1.28), which are connected via overlay VPNs and both have a virtual SteelHead deployed. It’s exactly the same concept as a user accessing the file server from a remote site that has a SteelConnect gateway and WAN optimisation, using a SteelHead-SD for example.
The SteelHeads have not been tweaked, the only features that were enabled were CIFS, SMB2 and SMB3 optimisation with the default settings.
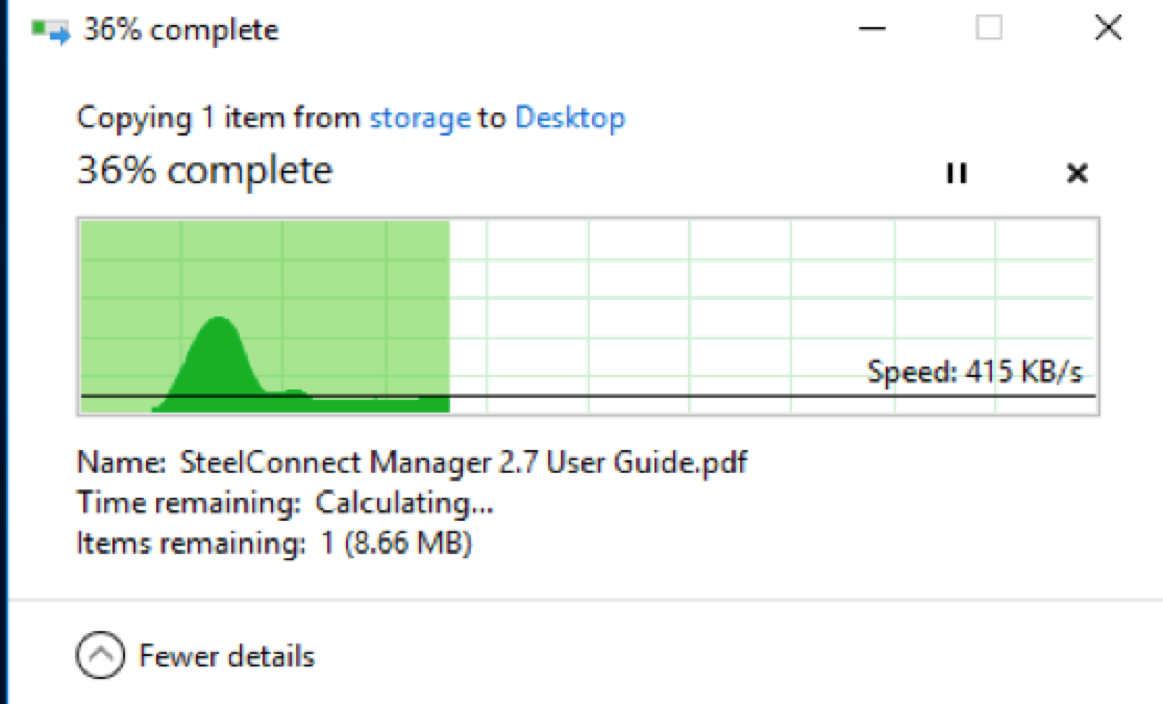
I’ll RDP into 10.35.1.4 (Dublin/Azure), and we’ll copy a file from the file server 172.31.1.28 (N.Virginia/AWS) and check the performance.

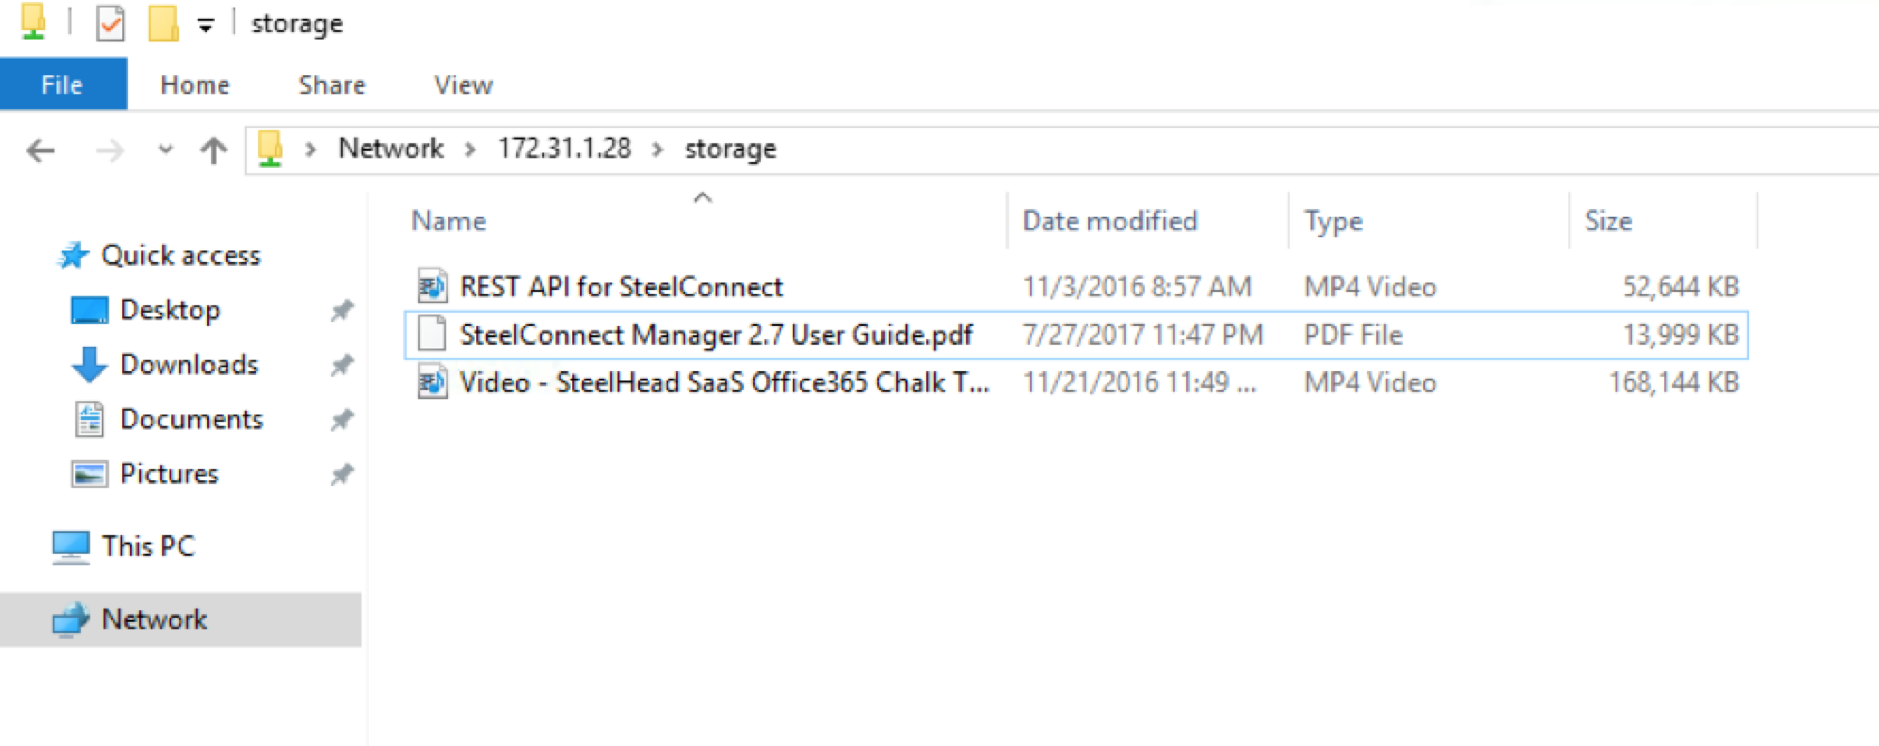
The file server on 172.31.1.28 (N.Virginia/AWS) has a few files, I’ll copy the 14MB PDF file to the desktop.
This is a first pass/cold copy, meaning that either SteelHead hasn’t seen the traffic before, and there is little to no optimisation taking place.
Looking at the Current Connections Report in the Azure SteelHead we see some optimisation taking place, but it’s not much which is expected as it’s data the SteelHead has never seen before.

After deleting the file locally and clearing the session, let’s copy the same file again. This time the SteelHeads have seen the data before, and can optimise it:
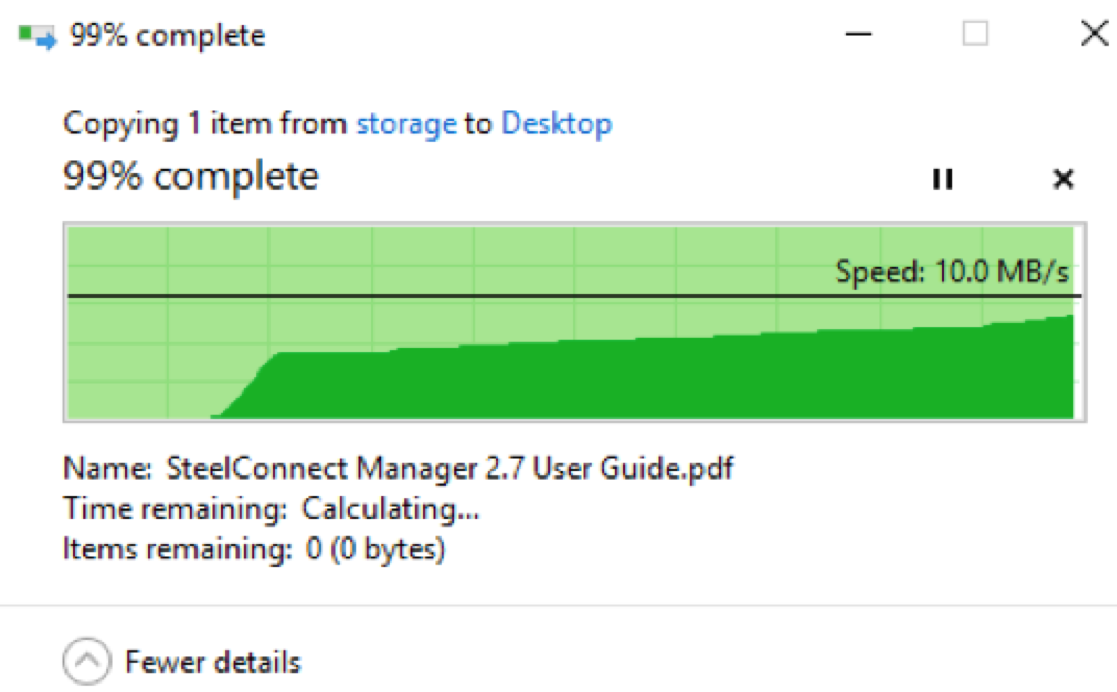
On the second pass we get a nice reduction of 97%, not too bad for a few minutes work!

Hopefully that provides a bit of an insight in how the AWS and Azure integration works and how easy it is to deploy and manage SteelConnect gateways, either on-prem or in the cloud. Want to optimise those applications in the cloud and improve user experience? No problem, that’s only a few additional clicks as you saw above.
If you want to test SteelConnect, head here for a free trial.
The complete series:
Part 1: SD-WAN for the masses
Part 2: Getting started with SteelConnect
Part 3: Native Amazon AWS & Microsoft Azure integration
Part 4: Intelligent traffic steering
Part 5: SD-LAN
Part 6: Application visibility
Part 7: REST API
Part 8: SteelHead integration