
The previous blog posts were more focused on the WAN side of SD-WAN, not surprising I guess. This one is more geared towards the faster side of a gateway: the LAN.
SteelConnect isn’t just for zero-touch provisioning (ZTP) your WAN or cloud gateways, it also has the capability to do the same for access points and switches and potentially manage a complete network from a cloud portal.
Disclaimer: I work for Riverbed, all views and expressions on this blog are entirely my own and don’t necessarily reflect the views of my employer.
The SteelConnect switches, access points and gateways are all managed from SteelConnect Manager, and there’s no dependency on having a SteelConnect gateway in a site for the APs or switches to work. You can use the access points as well for guest on-boarding using a guest portal.
If you’re interested in the full line-up of SteelConnect products, check the SteelConnect Spec Sheet (PDF). If you’re not interested you probably wouldn’t be reading this but in short: there are indoor and outdoor 802.11ac access points as well as 12-, 24- and 48-port switches, all with PoE+.
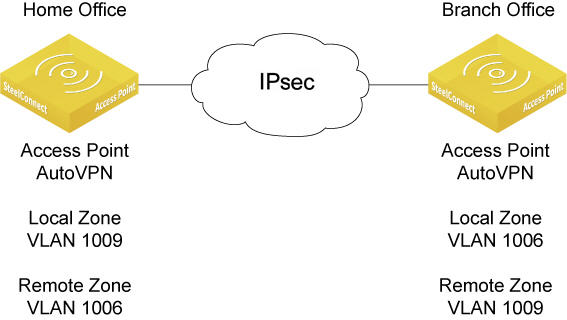
For small or home sites you might not even need a SteelConnect gateway, as the SteelConnect access points are capable to setup AutoVPN the same way a SteelConnect Gateway does, in either full-mesh or leaf mode.
In my setup I have a site with a 570-SD acting as the gateway, a 12-port SDI-S12 switch with an SDI-AP3 access point connected to it.
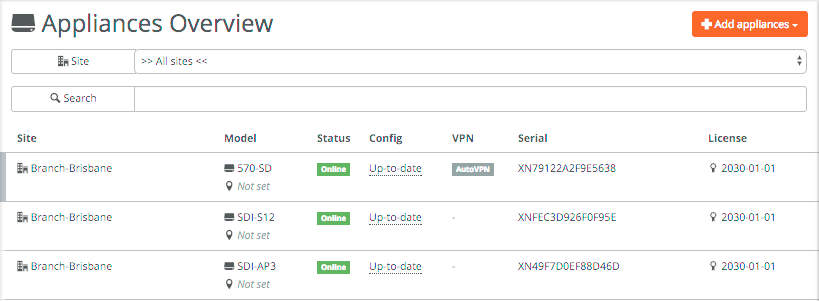
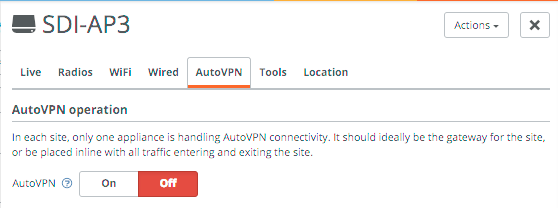
All appliances are part of a larger site with the 570-SD providing the AutoVPN functionality. If the AP3 would be the only SteelConnect device you can setup AutoVPN and the access point would automatically the IPSec tunnels similar to the gateway. This is ideal for home offices or small branch gateways with only a few users, ensuring that all outgoing traffic is encrypted with minimal infrastructure.
In all examples below I use a dedicated access point to discuss WiFi capabilities, but the same applies for the SDI-130W which is a gateway with a built-in access point.
Looking at the SDI-S12 switch in Appliances -> Ports you can see it has a handful of ports connected, with port 3 being an AutoTrunk port. This is a self-configuring trunk port between SteelConnect appliances, which is enabled by default. You can see the SDI-AP3 is detected, for non-SteelConnect devices LLDP is used to detect the device’s name.
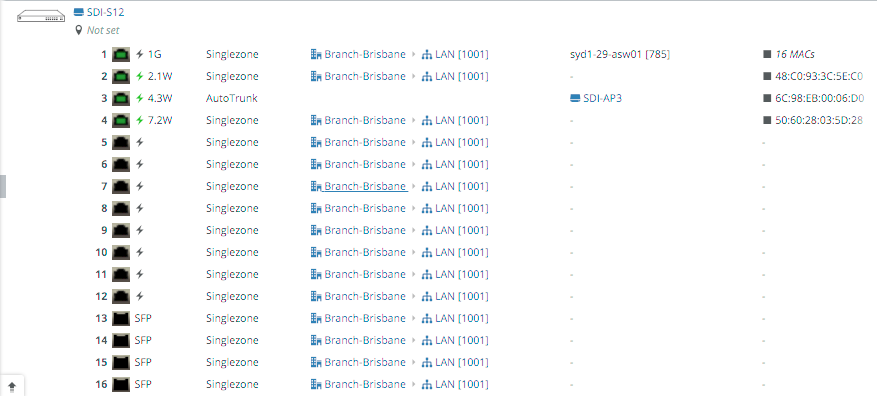
Clicking on a port (in this case port 3) will take you to the details for that port, and you can change the zone/VLAN for that particular port. Singlezone is equivalent to putting a port in access mode, multiport makes it a trunk (802.1Q) port.
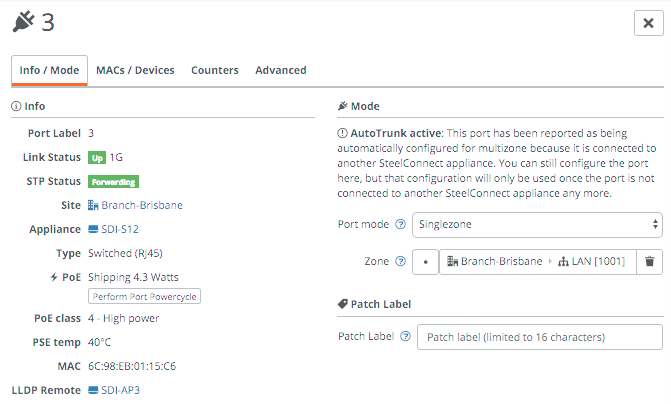
You can check the attached devices and interface counters in the other tabs.
Let’s look at the WiFi provisioning in more detail. First of all, you can use the planning tool in WiFi -> Planning to upload a map and place the access points.
For the actual WiFi provisioning, there are really only 2-3 steps if you have the right zones in place:
- Create the SSID(s).
- (Optional) - Create a portal.
- Broadcast the SSID(s) to the right sites.
Step 1 is to create the SSIDs in WiFi -> SSIDs. I’ve created a few different ones below with different types of security, including a guest one. For WPA2 Enterprise networks a RADIUS server needs to be defined.

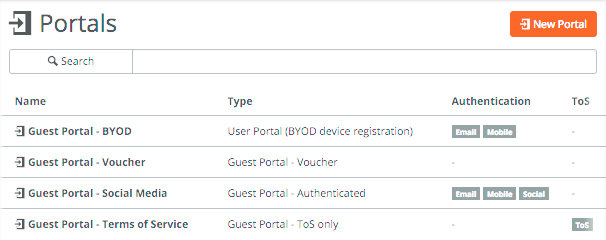
After creating the SSIDs, it’s time to setup any portals you want to use which is mainly used for guest portals. This is done under Network Design -> Portals.
I’ve created 4 different portals with different authentication methods. They probably all speak for themselves, with the option to use BYOD (SMS/email), vouchers, a Twitter/Google/Facebook account or just by accepting the Terms of Service.
Each portal can be customised for your environment.
Once you have the SSIDs and portal(s) created, go to WiFi -> Broadcasts and apply the above to a particular site. You can specify the bands you want to broadcast the SSID on (2.4Ghz and/or 5Ghz), the portal you want to use and if you want to use Dynamic Zone assignment. This allows dynamic mapping of devices/users into zones, either by setting the VLAN tag on the RADIUS server for WPA2 Enterprise networks or by using policy tags on user or devices for non-enterprise SSIDs.

That was a crash course into the LAN side of SteelConnect. With the acquisition of Xirrus by Riverbed earlier this year, one can only think there’s more cloud-based wireless goodness to come!
If you want to test SteelConnect, head here for a free trial.
The complete series:
Part 1: SD-WAN for the masses
Part 2: Getting started with SteelConnect
Part 3: Native Amazon AWS & Microsoft Azure integration
Part 4: Intelligent traffic steering
Part 5: SD-LAN
Part 6: Application visibility
Part 7: REST API
Part 8: SteelHead integration